i saw this a few weeks ago, accompanied by one of those time-lapse videos that always makes things look so easy...
and then i showed it to the old lady, who said "we should totally make one of those!" i saved the link and then promptly forgot all about it until i found myself killing time at michaels and walking past a bunch of the items on the supply list.
you know what happened next.
although i wasn't anticipating that days would go by, during which the old lady and her special friend adopted a sweet little chihuahua/corgi mix and wouldn't have time to come over and help put it together. heh.
look at all the crap it took to make this thing:
i decided to tackle the ears first, because they involved using something called "molding paste" that said it would dry slowly. and since there were approximately 38457029834 steps to this project, i figured they could dry while i did everything else. i started by scoring some lines around two styrofoam balls to make them look like pumpkins:
then i cut out some of the bottom so that they would lay flush on the top of the pumpkin.
the molding paste got slathered on, smoothing out the surface somewhat and then i put them on skewers to dry.
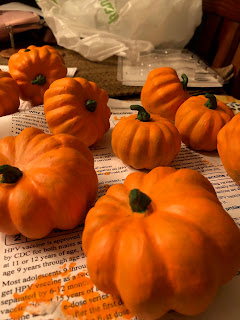
i'd had a lot of trouble finding small pumpkins to use for the base, but i did come across bags of metallic pumpkins and gourds that were 60% off, so i figured i could just paint them. they weren't easy to cover with the acrylic paint. after one coat:
this faux pumpkin was also half off, and i figured it would be better than using a real one since we could store this one away for use next year. you know, since it's less than two weeks from halloween and this project is only getting displayed for a little while.
the bean came home from her math tutor at that point and jumped right in, molding some air dry clay into a leaf for the top of the pumpkin.
next, she put the second coat of paint onto those pumpkins.
meanwhile, i got started on the base with a very janky circle cut out of fake moss, gluing it onto the foam circle.
a third coat of paint seemed to do the trick for those pumpkins.
the leaf was dry by then, and got a coat of green paint.
floral twine got twirled around brushes and pens and other objects and then were painted to resemble vines for the pumpkin base.
i cheated for the mickey face and used my die-cutter to cut out pieces that i then traced onto the pumpkin and painted in.
bamboo skewers got a coat of black paint for the poles around the base.
after adding the "curb" with some foam rings around the moss, i got started on gluing the pumpkins in a circle for mickey to sit on.
i added a second layer of pumpkins, some fake flowers and the "vines" along with the poles and a little black chain, and then it was ready for mickey:
so this is the last time we got to pose in front of the real main street mickey. it's been so long, he even has a different face. heh.
and voila:
not bad, if i do say so myself.


No comments:
Post a Comment
i heart comments. i wan-na hear what you have to say.
um, i think.